
In this guide
What you will complete
You will create a store-owned app, grant content access, connect its client credentials, and publish a test draft.
- 1Create the app in the store's Shopify organization
- 2Configure and release an app version
- 3Connect Shopify in Rankboard
- 4Let Rankboard manage access tokens
- 5Review the first Shopify article
What you need
Collect these details before you start the connection.
- Store URL
- https://your-store.myshopify.com
- Credentials
- Client ID and Client secret
- Scopes
- read_content and write_content
- Ownership
- The app and store must belong to the same Shopify organization
Connect Shopify
Complete each step in order. Provider screenshots link to their original documentation.
- 1
Create the app in the store's Shopify organization
Open Shopify's Dev Dashboard for the organization that owns the store. Select Apps → Create app → Start from Dev Dashboard, then name the app Rankboard.
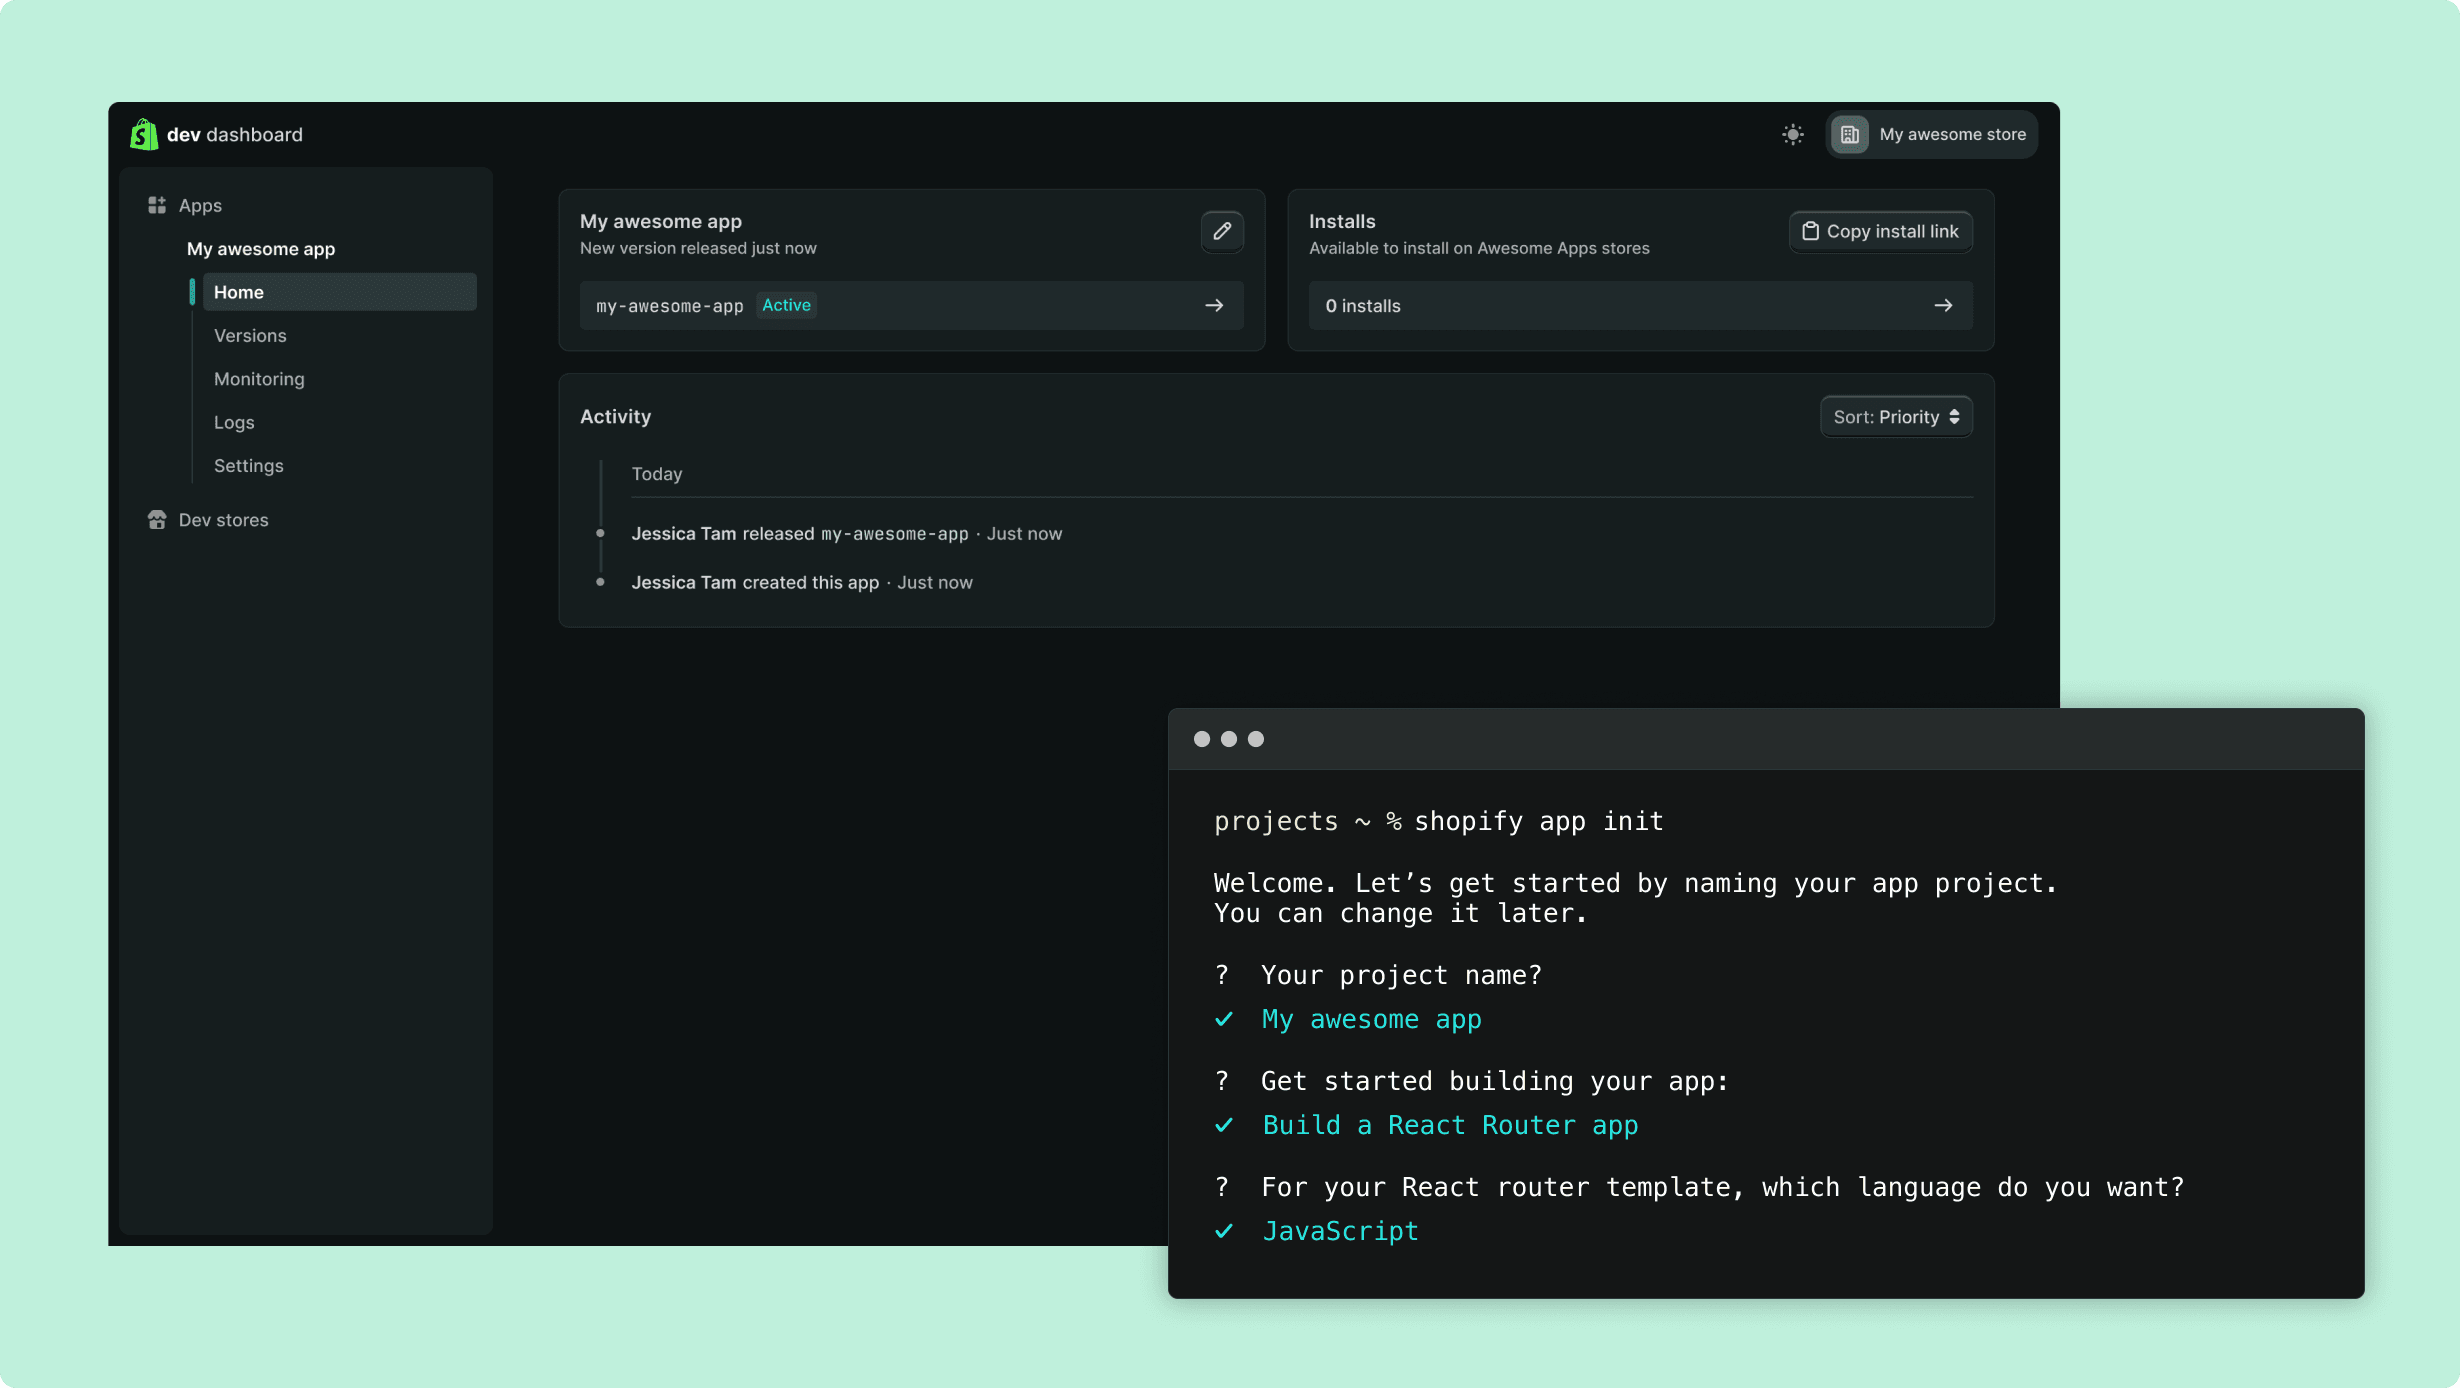
Create the store-owned app from Apps in Shopify's Dev Dashboard. Source: Shopify Dev Dashboard documentation ↗ - 2
Configure and release an app version
Open Versions, grant read_content and write_content, then release the version. Install the app on the target store. Open Settings and copy the Client ID and Client secret.
- Use credentials from the store-owned app you created, not credentials for a public Rankboard app.
- The canonical store address should use its *.myshopify.com domain.
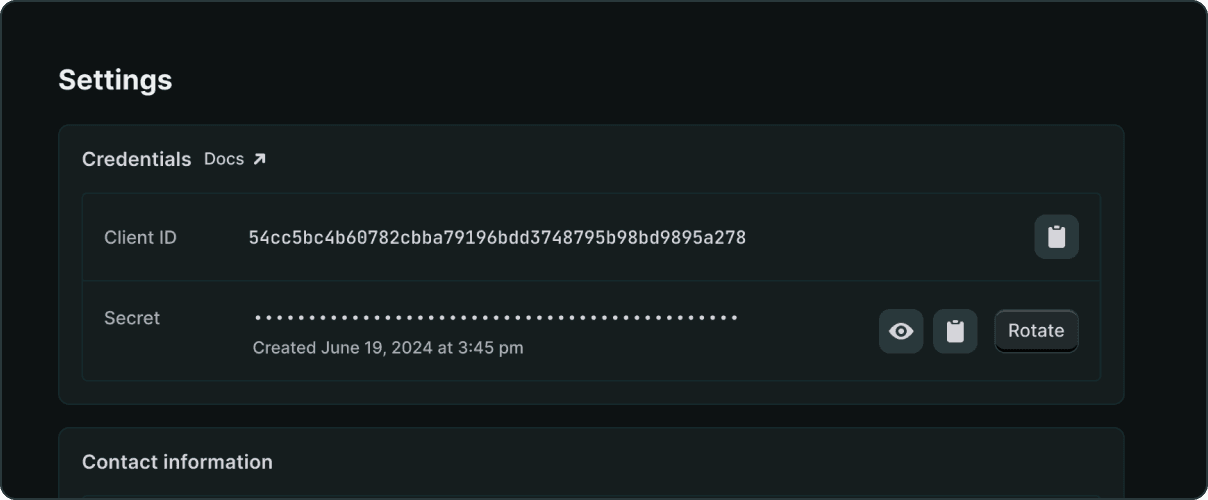
The app's Client ID and Client secret are under Settings → Credentials. Source: Shopify authentication documentation ↗ - 3
Connect Shopify in Rankboard
In the matching Rankboard project, select Settings → Integrations → Shopify. Enter the permanent *.myshopify.com store URL, Client ID, and Client secret.
- 4
Let Rankboard manage access tokens
Select Connect Shopify. Rankboard exchanges the client credentials for a 24-hour access token and renews it before it expires. Do not paste an access token into the form.
- 5
Review the first Shopify article
Rankboard uses the first existing Shopify blog or creates one named Articles. Send the first article as a draft and review it in Shopify before changing the project to direct publishing.
Data Rankboard sends
Review the data this integration reads or writes before you connect it.
- Article title, handle, rendered HTML body, and summary
- Draft or published state
- Featured image URL and alternative text when available
- Author name Rankboard
- Updates to the existing Shopify article after its first successful sync
Confirm the connection works
Run one draft test and verify the result before you enable direct publishing.
- Rankboard exchanges the credentials and runs a Shopify Admin GraphQL query before accepting the connection.
- After an article sync, confirm it appears under Content > Blog posts in Shopify.
- Verify the blog, handle, image, content, and visibility before enabling immediate publishing.
Fix common connection errors
Match the error to the issue below, then retry the connection.
Shopify reports shop_not_permitted.
Confirm both the app and store appear in the same organization in Shopify's Dev Dashboard. Merely installing an app from another organization is not enough for the client credentials grant.
Authentication succeeds but article creation is denied.
Add read_content and write_content to the released app version, release the change, and reinstall or update the app on the store before reconnecting.
The store URL is rejected.
Use the permanent https://store-name.myshopify.com address rather than a storefront custom domain or an admin URL.
Protect your credentials
Limit access, keep secrets private, and revoke credentials when the connection is no longer needed.
- Treat the Client secret as a password and never expose it in storefront code.
- Rankboard stores the credentials for server-side use and renews the approximately 24-hour access token automatically.
- Uninstall or revoke the app in Shopify and disconnect it in Rankboard to end access.
Read the Privacy Policy and Terms & Conditions for service-wide data terms.
Check the official documentation
Use these provider resources when an interface or policy changes after this guide is reviewed.