In this guide
What you will complete
You will create a site token, connect the matching Webflow site, and prepare the generated collection template for publishing.
- 1Create a site token with the required scopes
- 2Choose Webflow in Rankboard
- 3Paste the site token and connect
- 4Allow Rankboard to prepare the collection
- 5Design the collection template
What you need
Collect these details before you start the connection.
- Site URL
- Your custom domain or *.webflow.io site URL
- Credential
- A Webflow site token
- Scopes
- sites:read, cms:read, and cms:write
- Plan
- Site administrator access and a site with Webflow CMS enabled
Connect Webflow
Complete each step in order. Provider screenshots link to their original documentation.
- 1
Create a site token with the required scopes
Open Site settings → Apps & integrations → API access. Select Generate API token, name it Rankboard, and grant sites:read, cms:read, and cms:write. Copy the token when Webflow displays it.
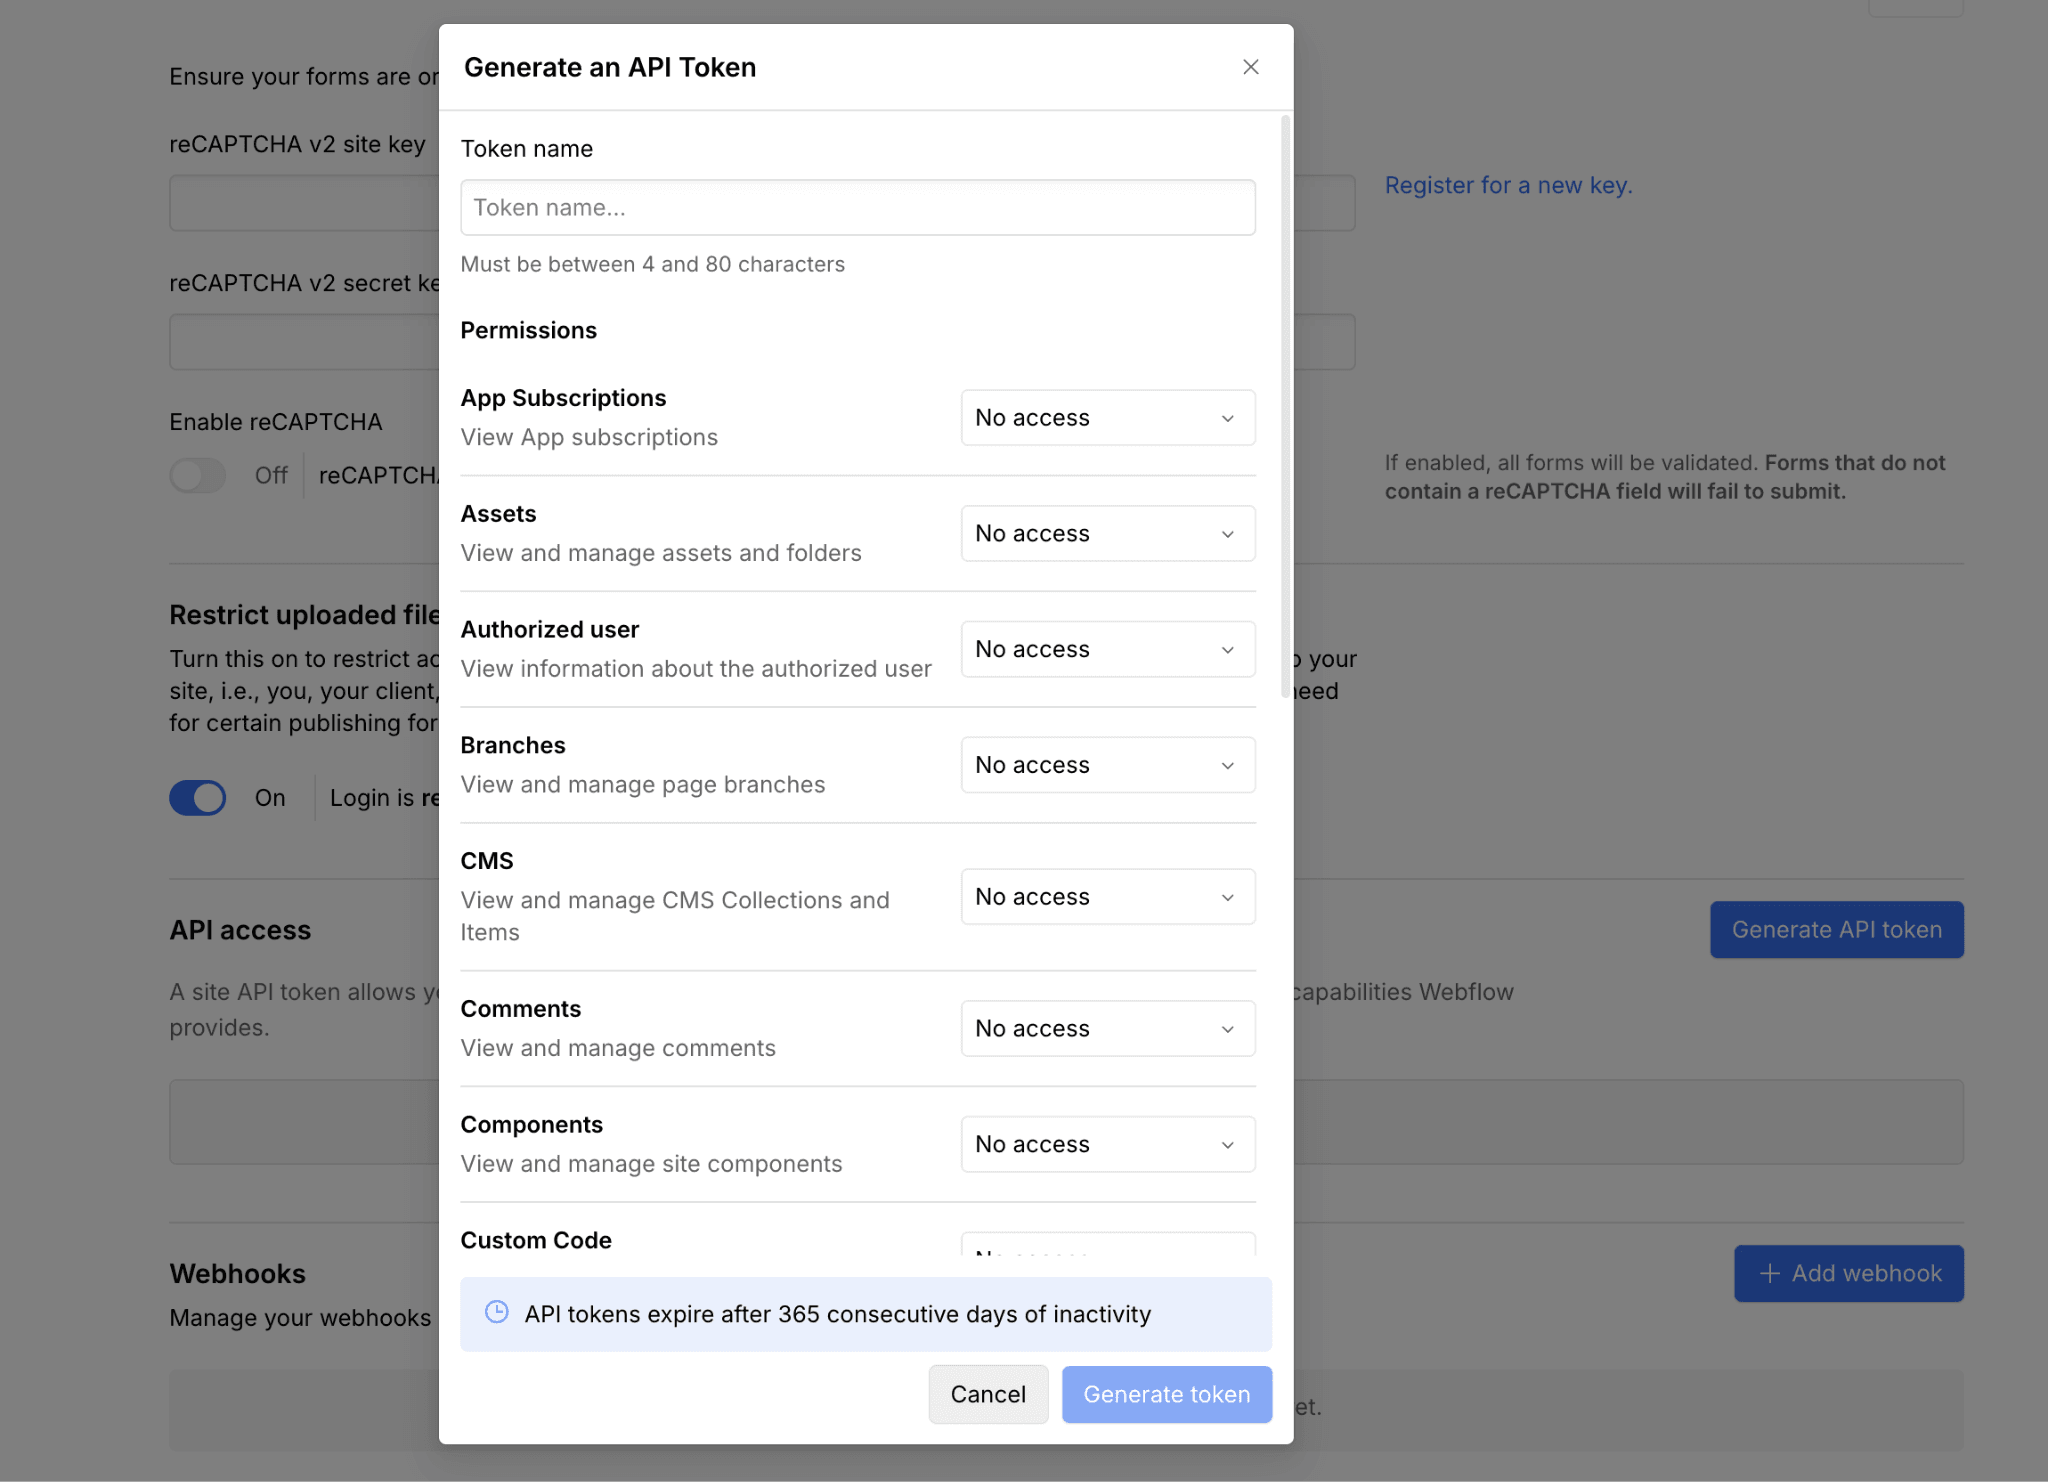
In Webflow's token dialog, name the token and grant the CMS permissions Rankboard needs. Source: Webflow CMS API guide ↗ - 2
Choose Webflow in Rankboard
Open the matching Rankboard project. Select Settings → Integrations → Webflow, then enter a custom domain or the site's *.webflow.io URL.
- 3
Paste the site token and connect
Paste the site token and select Connect Webflow. Rankboard lists the sites available to the token and matches the hostname you entered.
- 4
Allow Rankboard to prepare the collection
Send the first article. Rankboard reuses the rankboard-articles collection or creates Rankboard Articles with Content, Summary, and Featured image fields. New items start as drafts when the project publishing mode is Draft.
- 5
Design the collection template
In Webflow Designer, create or review the template page for Rankboard Articles. Bind the name, content, summary, and featured image fields to the page, then publish the Webflow site so published CMS items have a complete public layout.
Data Rankboard sends
Review the data this integration reads or writes before you connect it.
- Name, slug, rich-text article HTML, and summary
- Featured image URL when an article has one
- Draft CMS items by default, or published items when direct publishing is selected
- Updates to the existing collection item after the first successful sync
Confirm the connection works
Run one draft test and verify the result before you enable direct publishing.
- Rankboard checks the token, lists authorized sites, and matches the entered site URL.
- After the first sync, confirm the Rankboard Articles collection appears in Webflow CMS.
- Open the collection item and verify all fields before publishing the Webflow site.
Fix common connection errors
Match the error to the issue below, then retry the connection.
Rankboard cannot match the Webflow site.
Use a custom domain, the site's preview URL, or its exact *.webflow.io URL. Confirm the site token was created for that same site and includes sites:read.
Collection creation returns a permission error.
Recreate the token with cms:read and cms:write and confirm the site plan supports CMS and Data API operations.
The article exists but the public page is incomplete.
Bind every Rankboard Articles field in the Webflow collection template and publish the Webflow site. Publishing a CMS item does not design its template.
Protect your credentials
Limit access, keep secrets private, and revoke credentials when the connection is no longer needed.
- Create a site-specific token instead of a broader workspace token when possible.
- Grant only sites:read, cms:read, and cms:write for this workflow.
- Revoke the token in Webflow and disconnect the integration in Rankboard when it is no longer required.
Read the Privacy Policy and Terms & Conditions for service-wide data terms.
Check the official documentation
Use these provider resources when an interface or policy changes after this guide is reviewed.